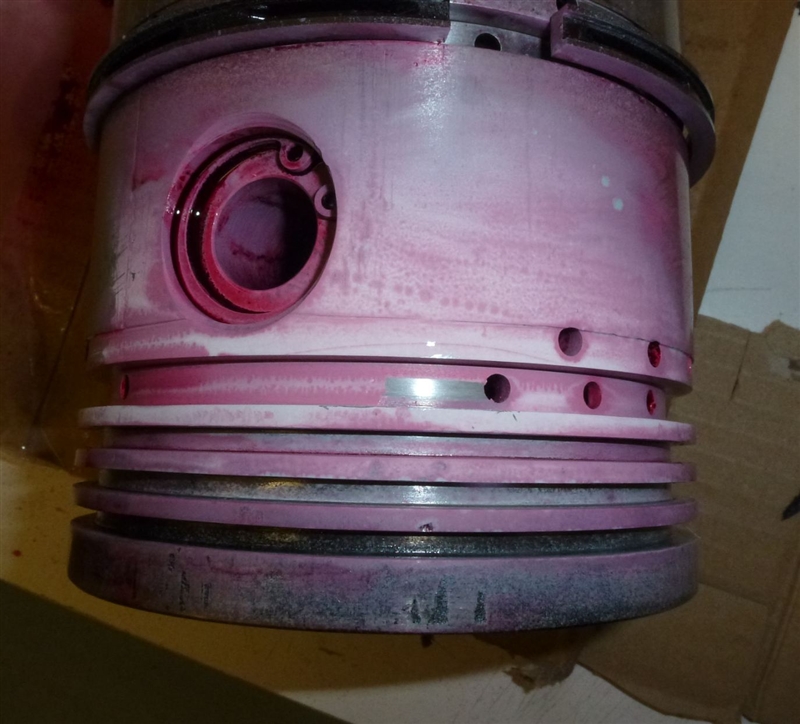
Number 4 piston was pulled out yet again, cleaned and then sprayed with dye penetrant. When the developer was applied it was apparent that a crack in the piston existed just above the oil ring. Although not an obvious source for such a pronounced clank replacing this piston seemed an obvious way forward.
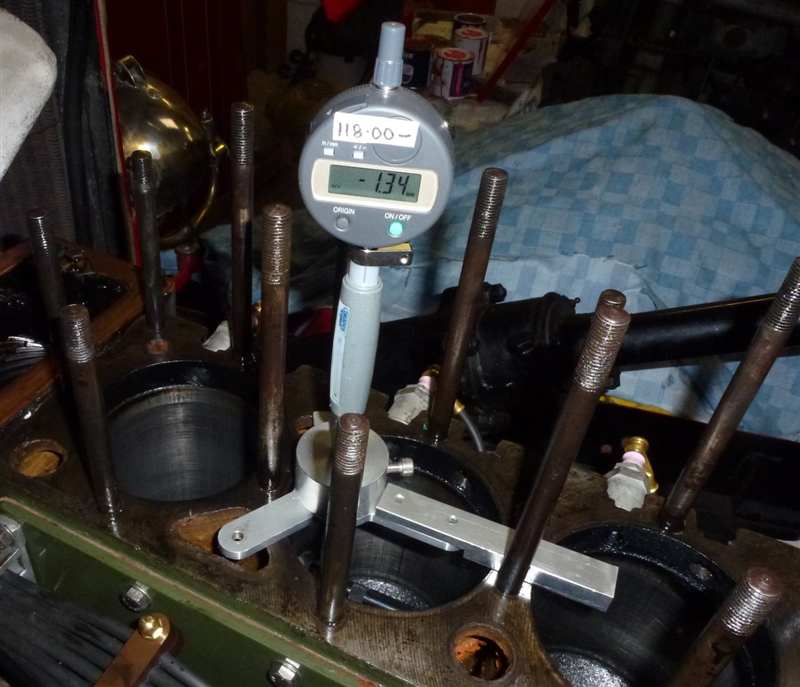
The problem being however was that a only a +040" replacement piston was not available when a +030" was required. It was decided to turn down the only available piston to the correct size. Before doing this an accurate assessment of bore size was required. to do this a bore gauge was used. Although bore gauges ae designed to be hand held a great deal of skill and experience are required to achieve repeatable and accurate measurements. A jig was therefore made to hold the bore gauge square to the bores. Bore gauges work in a subtractive mode. Rods are assembled in an additive mode to the next bore mm oversize (in this case 118mm) and the dial gauge records the amount to be subtracted. In this case the bore size is 116.66mm.
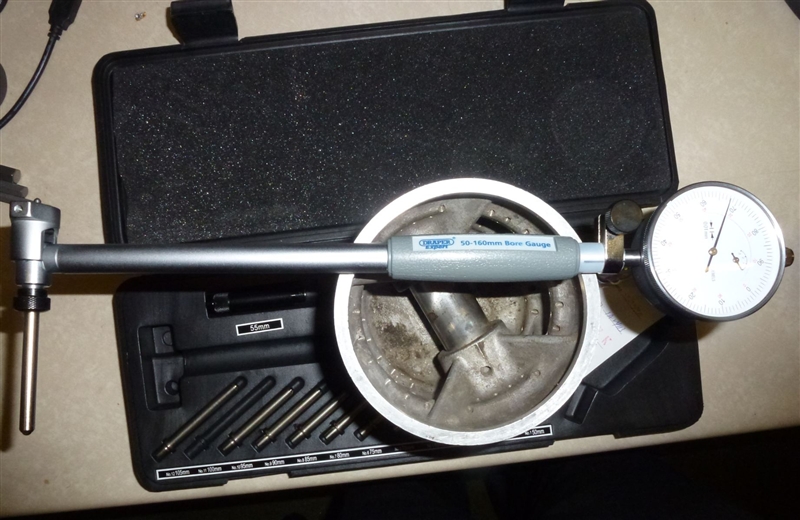
This picture shows the bore gauge with a set of rods at 5 mm increments. A further set of collars build up the assembled rod length to the nearest 1mm increment.
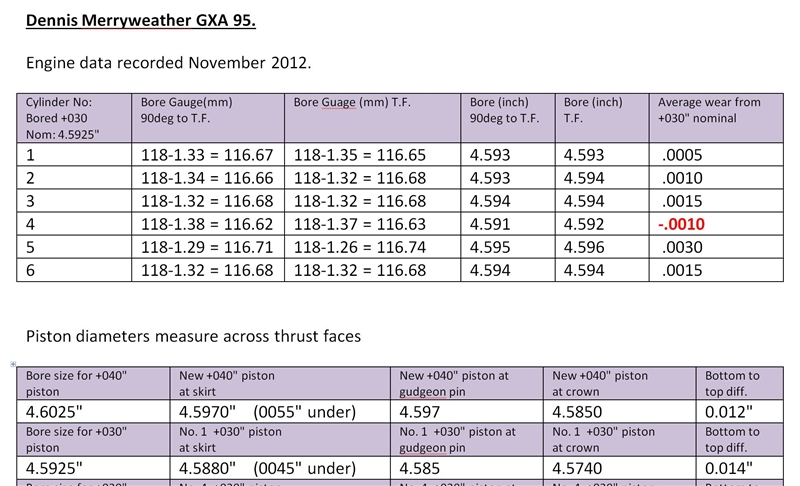
Here we see the final table of bore sizes.
Click HERE to continue the restoration story